I wanted to share a setup that has been working well for me for some time in keeping the layout of C# code consistent, easier to maintain and smoother when it comes to merging changes into git. It leverages ReSharper and SemanticMerge, two really awesome tools that allow you to remain focused on delivering features with minimum fuss.
With this setup, a simple keyboard shortcut restructures a C# code file according to defined settings, performing such actions as reordering members according to type, accessibility and name, removing regions, sorting Using directives and updating file headers. When it comes to merging these changes into source control, we can merge with confidence as SemanticMerge parses the C# file to determine changes at the class structural level, meaning we can happily reorder members ‘til our hearts content and let SemanticMerge deal with the fallout of determining the real changes. Enough of the hyperbole, let’s get set up!
Lay it all out
Members / File Layout
ReSharper has had, for as long as I can remember, the ability to define a members layout that can be used to define a pattern for the layout of C# code within files, invokable from the top menu using
ReSharper > Tools > Cleanup Code…
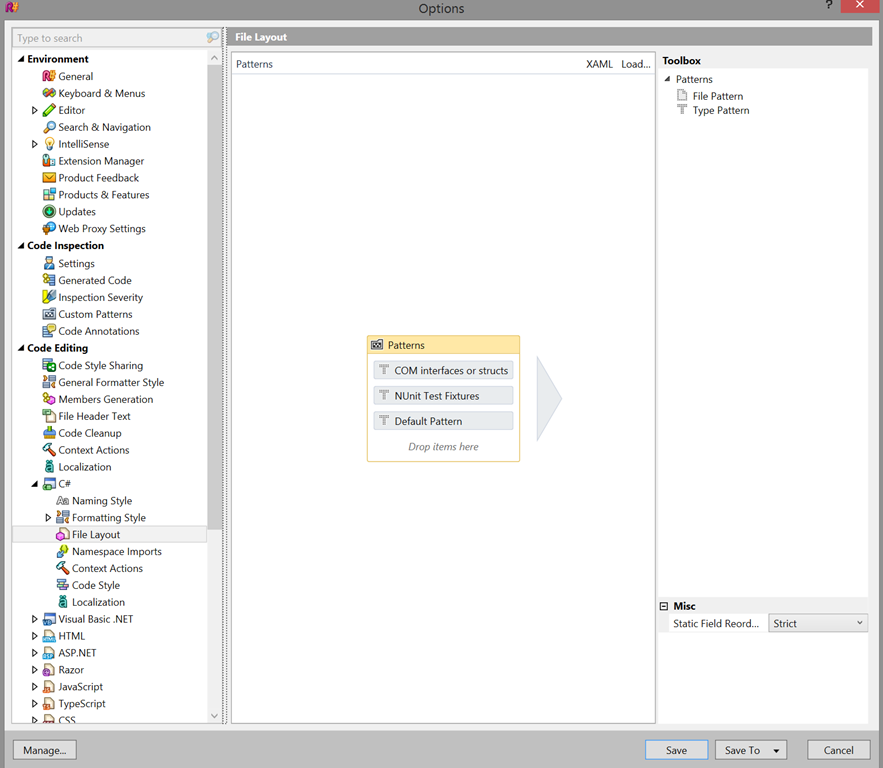
and running an appropriate Cleanup Code profile from the available options. Members layout is even better in ReSharper 9, having been renamed to File Layout and now including a GUI to define layout patterns, a much easier option to use over modifying the layout XML by hand as had to be done in previous versions:
To save you all of the hard work, I’ve defined a ReSharper.DotSettings file that I’ve been using for a while; it basically follows Microsoft guidelines with the exception that fields are prefixed with an underscore and the this. qualifier is not used. It reorders members according to type, access and name in order of
- public delegates
- public enums
- constants
- static fields
- readonly fields
- fields
- static constructors
- constructors
- properties and indexers
- interface implementations
- other members
- nested types
and also treats NUnit test classes differently by reordering members according to
- fields
- properties
- Test Fixture SetUp method
- Test Fixture TearDown method
- SetUp method
- TearDown method
- all other members
Go grab it now and let me know if you have any issues with it.
Setting up a Silent Code Profile
Import the ReSharper.DotSettings file into ReSharper using
ReSharper > Manage Options
Select This Computer and check all of the boxes to import all of the options. Once done, there should be a SilentCodeCleanUp profile under Code Cleanup and the profile to use with Silent Code Cleanup should be set to the SilentCodeCleanUp profile.
Keyboard Shortcuts
Next go to
Tools > Options > Keyboard
and Show Commands containing ReSharper_SilentCleanupCode. Select the Use new shortcut in : Text Editor option and Press shortcut keys CTRL + K, CTRL + D and click Assign to overwrite the default format document shortcut. Now whenever you are now in a file, you can tidy it up using CTRL + K, CTRL + D. You can set it up to run the command on saving the document if you prefer, but I personally like to run it with the shortcut as I will frequently save a file whilst working on it, before I am ready to clean things up. Here’s an example file before:
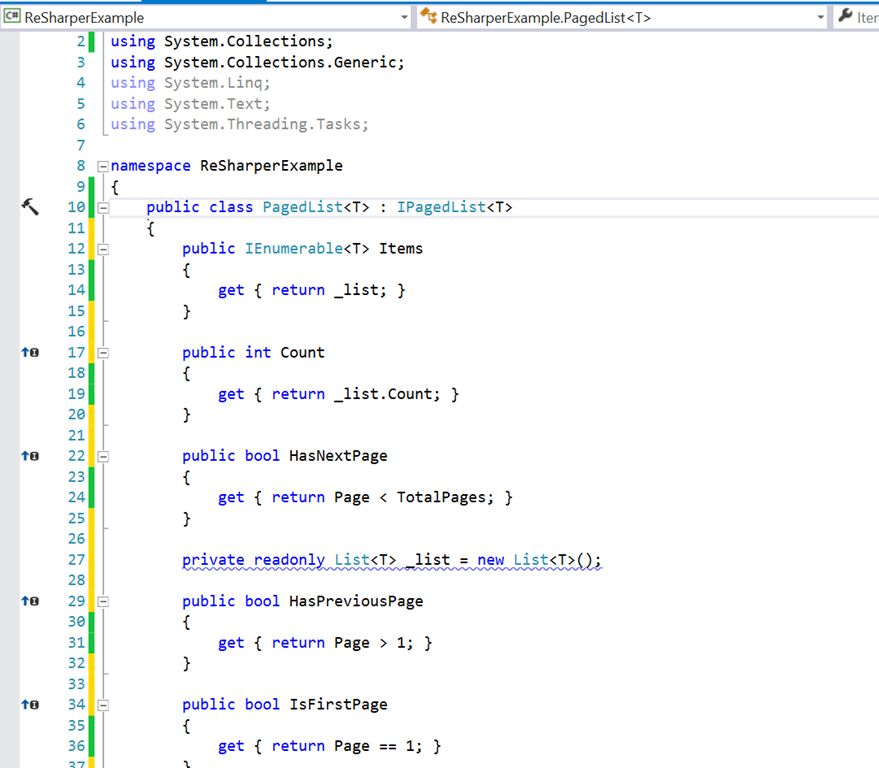
and after CTRL + K, CTRL + D:
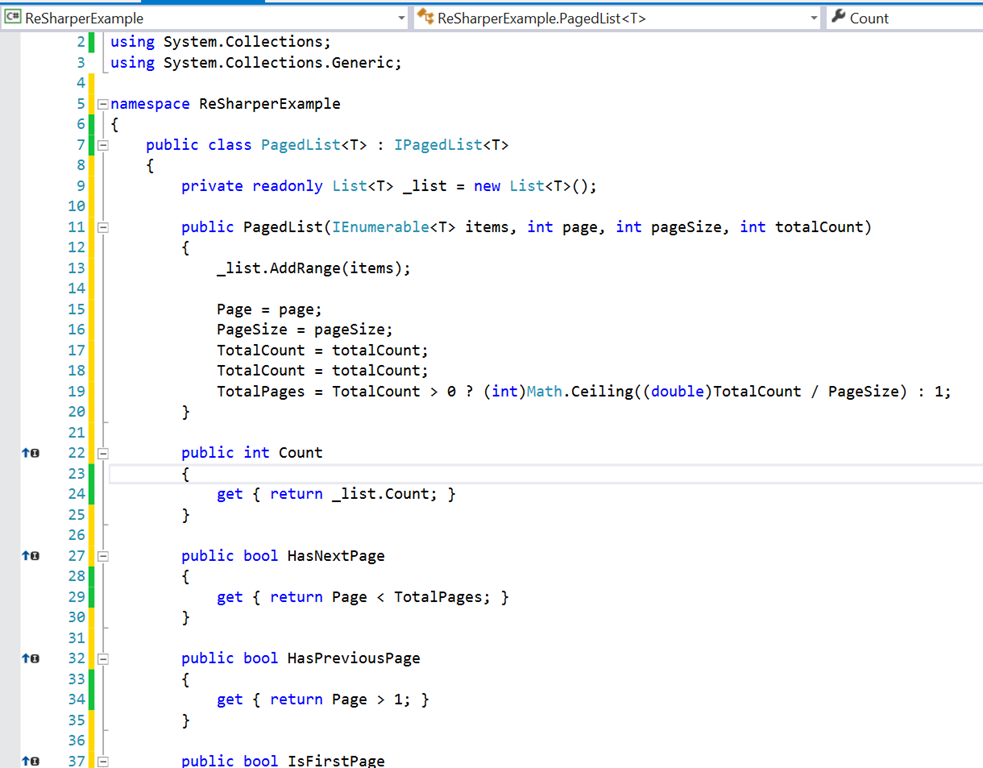
You can see that unused using Directives have been removed,the field has been placed first, followed by the constructor, followed by the property names in alphabetical order.
Style for miles
You can go one step further and integrate StyleCop with ReSharper so that running the shortcut will modify code to adhere to the StyleCop rules that you have set up (so long as they are aligned with the rules that you have defined in ReSharper, which you’ll be warned about on opening a solution if ReSharper and StyleCop rules are misaligned). To get this working with ReSharper 8.x is as simple as installing StyleCop with the msi available in the previous link; it’ll detect that ReSharper is installed and prompt for integration with it in the versions of Visual Studio that you have installed. ReSharper 9 requires a little more work due to changes in the ReSharper extension points but following the guidelines in the linked discussions appears to work without problems. Hopefully it won’t be long before the StyleCop project is updated to officially support 9. You can find a StyleCop settings file to use with the ReSharper settings above in this bitbucket repository.
So we’ve made it easy to make sweeping code reorganisations, where do we now face the pain for being good boy scouts / girl guides?
Easy merging
This is where SemanticMerge comes in. Having such a great diff/merge tool to hand means that you really can clean up with confidence, knowing full well that you won’t have a nightmare on your hands when it comes to merging. Of all the merge tools that I have tried (and there’s been a few), I can confidently say that SemanticMerge has been the one that’s worked best for me. Often, git will flag that there are merge conflicts, I’ll open them up in SemanticMerge and will have quickly determined that the code in both files is semantically identical, notified me that there are no real conflicts and allowed me to proceed with simply saving the result and closing the merge window. Just awesome.
Take a look at the webinar with JetBrains (makers of ReSharper) and Codice software (makers of SemanticMerge) for some more great examples and illustrations for how these tools can simplify your development process.